To restrict the displayed list elements, many lists of the application have a filter area.
The filter area of a mask depends on the display fields of the list. Depending on which information is displayed in the list, related filter criteria are available which you activate via checkboxes, selection lists, input fields or calendar fields. The filters do not differentiate between upper- and lowercase letters.
By means of the status display of the filter (Filter active or No filter active) in the upper button bar of a list, you can see whether a filter is active for the opened list. In the status display it is also indicated how many list elements the filter criteria are applied to and how many list elements exist in total.
If a user is not allowed to see all or any list elements due to missing authorisations (e.g. for account or text keys), a tooltip is displayed next to the number of objects found, indicating the reason why data is not displayed or the display is limited.
For some lists a default filter is defined. The default filter is included in the scope of delivery of the application. You cannot change or delete the default filter. You recognise the default filter by the addition (default) in the filter name.
For most lists you can define and save up to ten filters with a name of your choice. The filter name may have up to 150 characters. You can define one filter per list as the start filter, which is then active when the mask is opened.
|
1. |
Click on The mask area for selecting the filter criteria opens. |
||
|
|

|
||
|
2. |
Select the filter criteria in the displayed fields, or fill the filter criteria into the input fields. |
||
|
3. |
To reset individual filter criteria, click on
|
||
|
4. |
Only for lists with filters that can be saved: To permanently save the selected filter criteria, enter a name for the filter in the field Save as filter. Save your input. In the selection list, your saved filter is displayed in the status area of the filter. |
||
|
5. |
To apply a filter to the displayed list, click on Apply filter.
|
||
|
6. |
To reset all defined filter criteria for this mask, click on
|
||
|
7. |
To close the mask for entering the filter criteria, click on
|
 or on the status display of the filter.
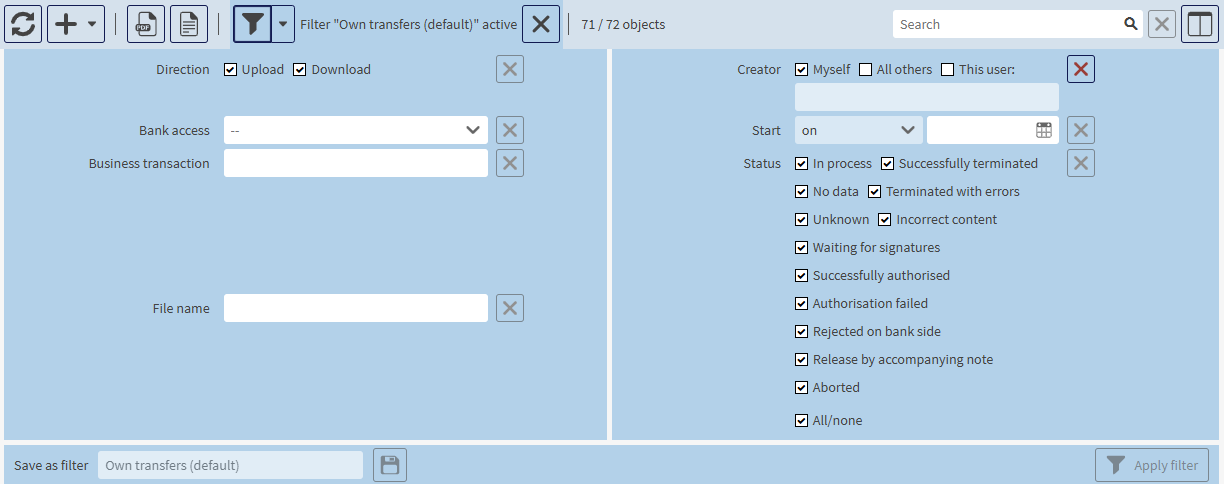
 next to the filter criterion.
  in the status area of the filter.
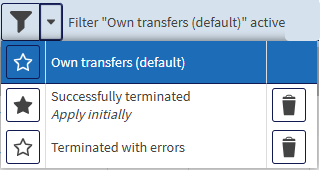
 .
. .
.
The display has the following meaning:
|
|
The default filter is active. |
|
|
The number of list elements found with the filter criteria is zero. |
|
|
The total number of existing list elements is one. |
The displayed list is empty, although a list element exists. The existing list element does not match the defined filter criteria.